Getting Started
Go from zero to a working PincerPay integration in 5 minutes.
PincerPay is an x402 payment gateway. Merchants add middleware to accept USDC; agents wrap fetch calls to pay automatically. This guide gets you from zero to a working integration in 5 minutes.
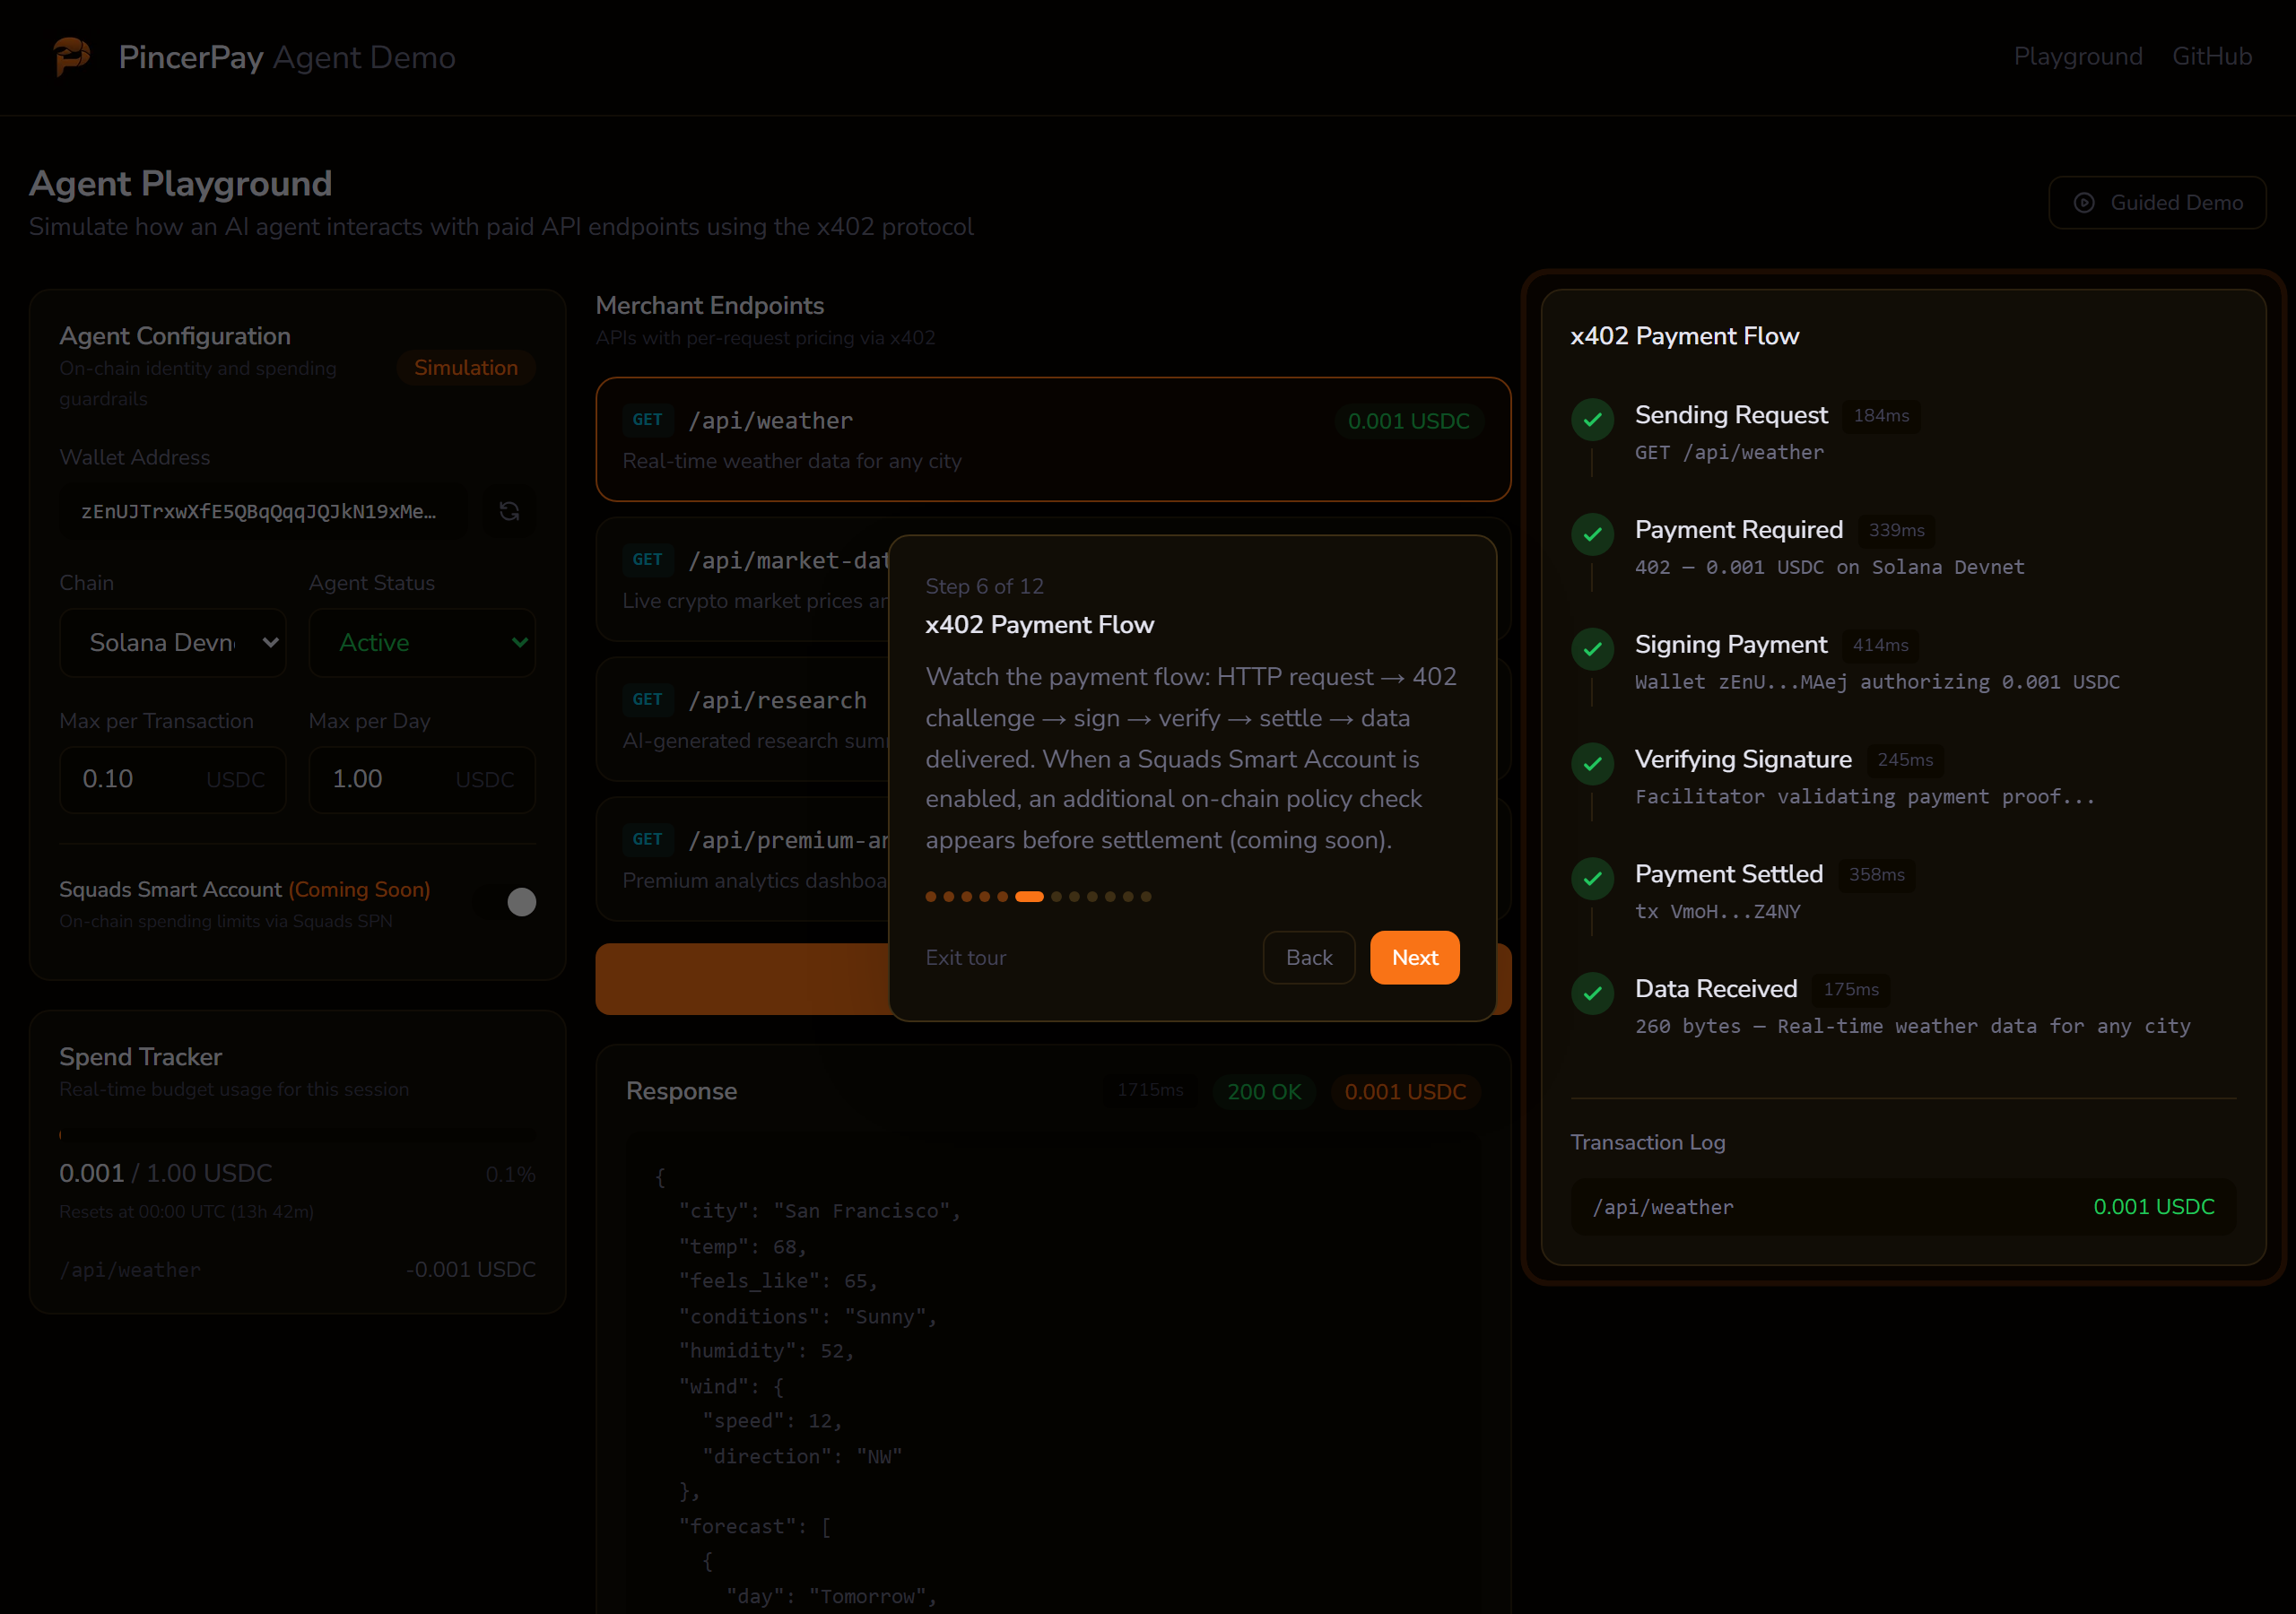
Want to see it first? The interactive demo walks through the full payment flow in your browser, no wallet or code required.
How It Works
Agent requests resource
        |
        v
Merchant returns HTTP 402 + payment requirements
        |
        v
Agent signs USDC transaction
        |
        v
PincerPay Facilitator verifies + broadcasts transaction
        |
        v
Merchant delivers resource
- An AI agent sends a request to your API endpoint
- The PincerPay middleware intercepts the request and returns
402 Payment Requiredwith pricing info - The agent's PincerPay client automatically signs a USDC transfer
- The PincerPay Facilitator verifies the payment and broadcasts the transaction on-chain
- Your middleware confirms payment and allows the request through
Quick Start
1. Sign Up
Create an account at pincerpay.com/signup. You'll land in the merchant dashboard.
2. Create Your Merchant Profile
Go to Settings and fill in:
- Business name: displayed to agents
- Wallet address: your Solana (or EVM) address for receiving USDC
- Supported chains: select
solana(recommended), or addbase/polygonfor EVM
3. Generate an API Key
In Settings, scroll to API Keys and click Generate Key. Copy it now, because it's shown only once. The key format is pp_live_xxxxxxxxxxxx....
Skip the dashboard? The Merchant Onboarding guide covers the CLI and MCP paths that bundle wallet generation + merchant creation + API key into a single command.
4. Create a Paywall
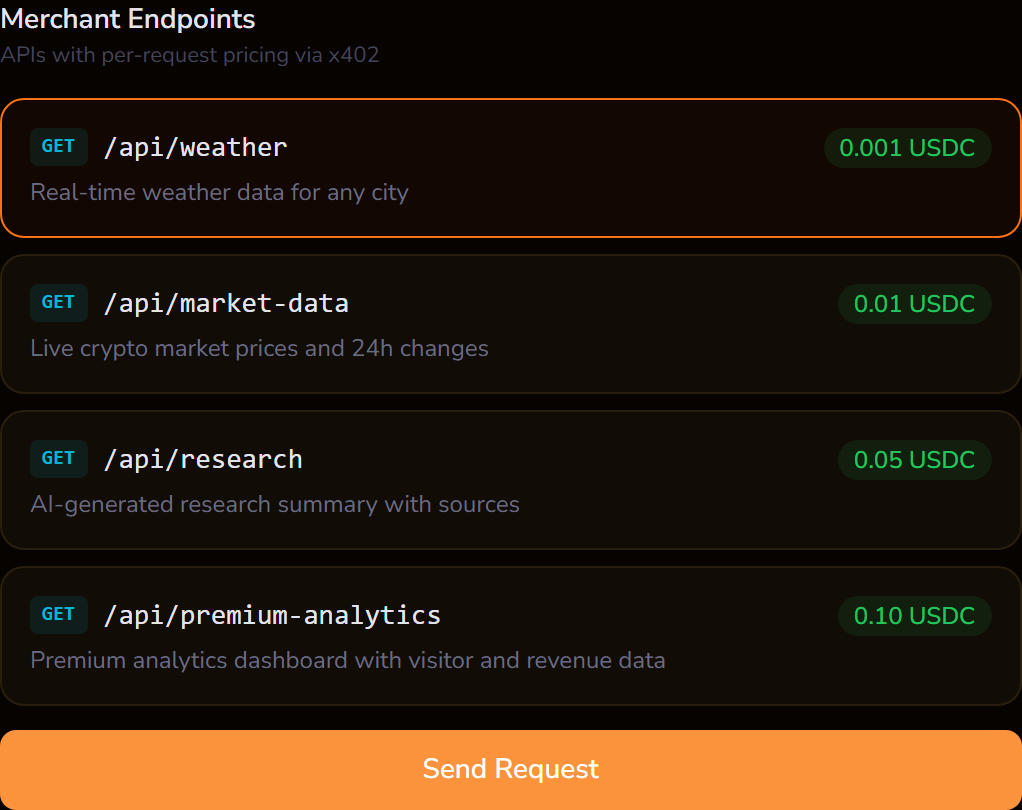
Go to Paywalls and click New Paywall:
- Endpoint: the route pattern, e.g.
GET /api/weather - Price: amount in USDC, e.g.
0.01 - Description: what the agent gets (shown in the 402 response)
5. Install the Merchant SDK
npm install @pincerpay/merchant
6. Add Middleware
Three lines of Hono middleware:
import { Hono } from "hono";
import { serve } from "@hono/node-server";
import { createPincerPayMiddleware } from "@pincerpay/merchant/nextjs";

const app = new Hono();

app.use(
  "*",
  createPincerPayMiddleware({
    apiKey: process.env.PINCERPAY_API_KEY!,
    merchantAddress: "YOUR_SOLANA_WALLET_ADDRESS",
    routes: {
      "GET /api/weather": {
        price: "0.01",
        chain: "solana",
        description: "Current weather data",
      },
    },
  })
);

app.get("/api/weather", (c) => c.json({ temp: 72, condition: "sunny" }));

serve({ fetch: app.fetch, port: 3000 });
Multi-chain merchants: swap
merchantAddressformerchantAddresses: { solana: "...", polygon: "0x...", base: "0x..." }and listchains: ["solana", "polygon"]on each route. See Merchant SDK.
7. Test It
Install the agent SDK and run a test payment:
npm install @pincerpay/agent
import { PincerPayAgent } from "@pincerpay/agent";

const agent = await PincerPayAgent.create({
  chains: ["solana-devnet"],
  solanaPrivateKey: process.env.AGENT_SOLANA_KEY!,
});

const res = await agent.fetch("http://localhost:3000/api/weather");
const data = await res.json();
console.log(data); // { temp: 72, condition: "sunny" }
Check the Transactions page in your dashboard to see the payment.
Examples
Working examples you can clone and run locally:
- Next.js Merchant: Hono catch-all route handler with paywalled endpoints in a Next.js 15 app
- Express Merchant: Express server with free and paywalled routes at different price tiers
- Weather Agent: AI agent with spending policies that pays for weather data automatically